Publishing allows you to send copies of your cases to other teaching file servers that reside outside the hospital firewall so they can be viewed by the public. When you publish a case, patient identifiers are withhheld from the case fields (although you still need to be careful not to publish screen shots containing patient identifiers).
Your system may be configured to allow publishing to one or more destinations, including MyPACS.net (the free public teaching file server), and possibly a publicly accessible teaching file server managed by your institution. To determine whether or not your account is enabled for publication, visit one of your cases and look for the "Publish" link in the case title bar. If it does not appear, it means that you do not have publication priviledges, in which case you should contact your administrator for help publishing.
You may publish a case if (1) you have write permissions on that case and (2) your account has been granted publication privileges. To publish a case:
-
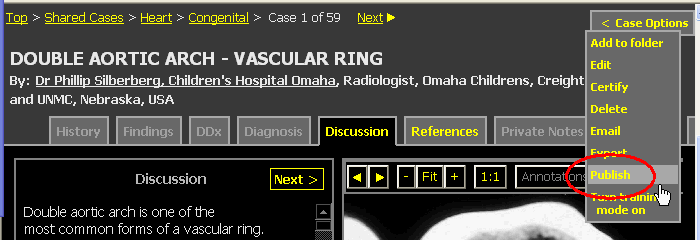
Visit the case you want to publish, and choose "Publish" from the Case Options drop down menu (for more information see
Classic Case Viewer
):

Note: if the Publish link does not appear, either you do not have write privileges to the case or your account does not have publication privileges.
-
From the publication form, you may be prompted to select from a
menu of possible destinations. If you do not see a destination menu, it means
that there is only one possible destination.
When publishing to a publicly accesible server attached to your institution's teaching file system it is not necessary to enter a login ID and password, simply click the "Publish" button:
When publishing to MyPACS.net or any other destination not affiliated with your instution's system you will need to enter the login ID and password of your account on the destination server and then click the "Publish" button:

Note: if you do not have an account on the destination server, go to the destination server and sign up for one. If the destination server is managed by your institution, you may need to request the login and password of an existing publication account.
-
It may take a minute or two for the publication process to complete.
You should see a confirmation when the case has been received:

The published cases are now available on the destination server. They are owned by the account which you specified in the publication form.
To publish multiple cases at once, add them to a folder , and then publish the contents of the folder:
-
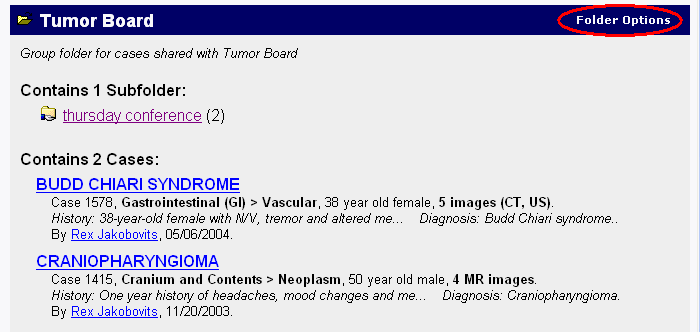
Visit the folder you want to publish, and click on "Folder Options"
in the folder title bar:

-
From the Folder Options page, click on "Publish Folder" which appears
under "Misc. Operations":

Note: if the Publish Folder link does not appear, either you do not have publication privileges, or the folder contains no cases which are publishable by you.
- You will be prompted to enter the login ID and password if the destination server is not affiliated with your institution's system. Enter destination credentials and submit the form, following instructions as described above for publishing a single case.:

Note: When publishing to a publicly accesible server attached to your institution's teaching file system it is not necessary to enter a login ID and password, simply click the "Publish" button.