The Case Editor allows you to enter descriptive data about the case, such as title, patient information, exam date, modalities, and anatomy/pathology categories.
Enter this information on the Case Properties tab. You can switch freely between the five tabs, entering properties, text, and images in whatever order you like. Be sure to save your changes when you are done.
Most case properties are optional, but some may be required, depending on the policy configured by your system administrator. Required fields are marked with a red asterisk (*). You will not be able to save the case until you’ve assigned values to all required fields.
Note: if you are using the Enhanced Editor and plan to create cases from DICOM images, you may be able to use the DICOM tab’s interface to fill in most of the case properties from the DICOM header fields without having to type them in by hand. Please see the section Using the DICOM Interface for more information.
The following properties are part of the default case template. Some of the default properties shown here may have been disabled by your administrator, in which case they would not appear on your form. Your case template may have additional custom properties that are not listed here.

The title will appear at the top of the case and in the case abstract when training mode is not turned on. It is OK to mention the diagnosis in the title – you won’t be giving away the answer because the title will be hidden when users are viewing the case as an unknown.

Use the dropdown menus to specify access control settings. Set Readable By to “Owner Only” if you want the case to be private. Set it to “All Users” if you want to share it with the public. If you belong to any groups, you can also specify group-level sharing.
On some systems, the “All Users” option may read “All Users (pending review).” This means that cases must be certified by an expert reviewer before they are made public, to ensure that private patient information is not revealed. Saving your case will submit it for review. After a certifier has reviewed your case, you will receive an automated email telling you whether the case was certified or rejected. Certified cases will automatically be made public; rejected cases will be remain private.
Set Writable By to “Owner Only” if you do not want other users to be able to edit your case. Alternatively, you can specify that the case is writable by members of a group you belong to. If the Writable By field does not show up, it means you do not belong to any groups. See Managing Groups for more information.

If your system allows patient identifiers, you may be prompted to enter a name, patient number, and date of birth which are useful for performing followup studies. To protect patient privacy, the patient name, number, and date of birth will be hidden from users other than the case author and administrator. Whenever someone visits the case, the system will keep a log of whether or not the patient information has been displayed. You may also be prompted for demographic information such as the age and gender. It may be possible to automatically fill in some of these values using the DICOM interface.
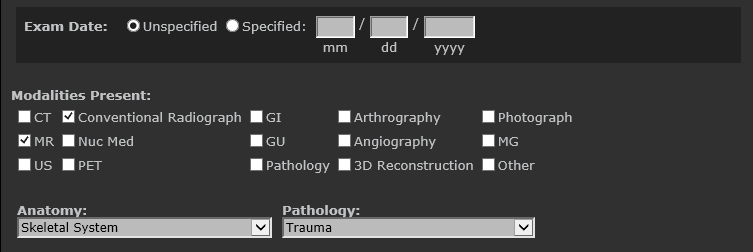
You may enter additional information about the case, including the exam date, modalities, pathology, anatomy, keywords, and ACR codes. Your case will be classified according to the values you select using the dropdown menus for pathology and anatomy. The more information you fill out, the easier it will be for users to find your case using the Advanced Search form. It may be possible to automatically fill in some of these values using the DICOM interface.

You may assign additional owners by clicking edit next to Owned By. Each owner will have full privileges over the case, including the ability to delete it or make further changes to the ownership of the case. Note that you can grant someone write access to a case without making them an owner of the case.
You may edit the authorship of the case by clicking edit next to Authored By. The owner and author of a case are now separated. A case can also have multiple owners and authors. To add or remove owners and authors click edit to bring up a list of users.
Next: Entering Case Text