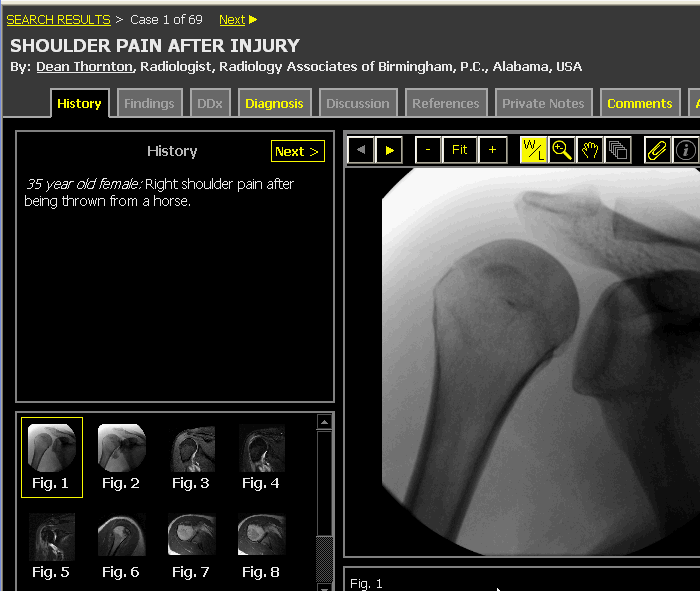
The purpose of a teaching file is to organize and display educational images. Key images are imported from PACS or other sources, and grouped into cases, where they are annotated with captions and presented through the Case Manager. For optimal viewing in a web browser, the teaching file server automatically formats images to several standard sizes and converts them to JPEGs. To view case images, simply navigate to a case using the category browser, the search form, or a folder, and the images for that case will appear as thumbnails in the bottom left portion of the viewer with the selected image appearing in the main viewing pane. For previous interface see Classic Case Viewer.

This section describes how to select images for viewing, resize images, zoom and pan images, view images only, view annotated images, retrieve images in their original format, and save images to your hard drive.
When a case is opened in the viewer the first image is displayed by default. A yellow box will appear around the thumbnail of the image that is currently being displayed. To display another image click on the thumbnail representation (as you move your screen pointer over the thumbnails a yellow box will indicate which image you will be selecting). You can also cycle through the images by clicking the forward/back icons on the image toolbar.
Images may be imported from multiple sources, having vastly different dimensions. For example, a CT image may be 512x512 pixels, while a digital photo of a chest x-ray may be 1600x1200 pixels. Since the dimensions of the image pane can be changed the server automatically generates an image that fits in the display area. Clicking the "Fit" button will change the size of the image to accomadate the display area. To blow up the image click the "+" button, and to shrink the image click the "-" button. By repeatedly clicking the "+" and "-" buttons you can achieve the desired resizing:

If the ![]() button in the image toolbar is yellow then you can adjust the W/L for the image that is being displayed. Click the button and adjust the window/level by positioning your mouse over the image, holding down the left button, and moving the mouse up and down and side to side to adjust the W/L values.
button in the image toolbar is yellow then you can adjust the W/L for the image that is being displayed. Click the button and adjust the window/level by positioning your mouse over the image, holding down the left button, and moving the mouse up and down and side to side to adjust the W/L values.

To zoom on an image click the ![]() button. Position your mouse over the image, hold down the left button, and move the mouse up and down.
button. Position your mouse over the image, hold down the left button, and move the mouse up and down.
To pan on an image click the ![]() button. Position your mouse over the image, hold down the left button, and move the mouse up and down and side to side to focus in on a specific section of an enlarged image.
button. Position your mouse over the image, hold down the left button, and move the mouse up and down and side to side to focus in on a specific section of an enlarged image.

If the ![]() button in the image toolbar is yellow then you can view the DICOM series from which the image originated. The button is active only if the series is available in the teaching file's DICOM queue. Click the button to load the entire series in the case viewer. Once all the images load you can scroll up and down through the image stack by positioning your mouse over the image, holding down the left button, and moving the mouse up and down.
button in the image toolbar is yellow then you can view the DICOM series from which the image originated. The button is active only if the series is available in the teaching file's DICOM queue. Click the button to load the entire series in the case viewer. Once all the images load you can scroll up and down through the image stack by positioning your mouse over the image, holding down the left button, and moving the mouse up and down.

Click the  button in the image toolbar the invert the pixel values of the current image. This will display white-on-black images as black-on-white, and vice versa. Click the button again to revert.

If the ![]() button in the image toolbar is yellow then there is an annotated version of a particluar image. Click this button to toggle between the original and the marked up version of the image.
button in the image toolbar is yellow then there is an annotated version of a particluar image. Click this button to toggle between the original and the marked up version of the image.

If the ![]() button in the image toolbar is yellow then you can click it to view the DICOM series information associated with the presenting image.
button in the image toolbar is yellow then you can click it to view the DICOM series information associated with the presenting image.

To reduce ambient light and create a more favorable environment for viewing fine details in the images, you enter "images only" mode by clicking "Full Screen" button:

This will display the images without the banner, thumbnails, or the case text. You can cycle through the images by clicking the forward/back icons on the image toolbar. To return to the case view, click "Return to case".
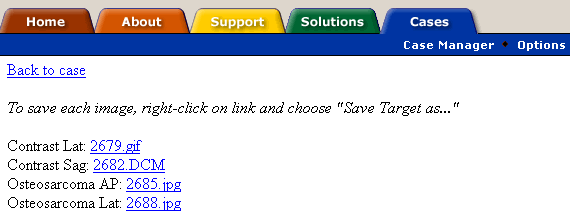
Although the case images are always displayed as JPEGs, the server does keep the original uncompressed files. These can be retrieved by the case author at any time. While viewing your own cases. The case must be displayed in the classic viewer in order to retrieve the original file. To switch to the classic viewer click the link at the bottom of the page of the tabs-based viewer.

After switching to the classic viewer you will see a control called "original format" to the right of the size controls above the images.


The format of each file is evident from the filename extension (for example, "3061.DCM" is a DICOM file). To retrieve a copy of one of the images in its original format, right-click on the filename and choose "Save Target As...".
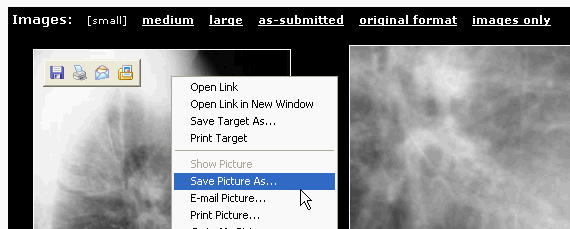
You may want to save copies of case images to your hard drive for use in external software, such as a Powerpoint presentation. If your system allows it, follow these steps:
- Click on the desired image size (e.g. "medium")
- Right-click on the image you want to save.
- Choose "Save Picture As..." or similar option from the browser popup menu.
- Specify a destination on your hard drive for the image file.

Some systems are configured to disallow saving images from cases that you do not own. If your system adheres to this restriction, you will be prevented from saving images unless you own the case.
Next: Using Training Mode