You may add cases to any folder that is writable by your account. This
includes folders you've created, publicly writable folders, and folders
that are writable by groups you belong to.
It is important to understand that folders contain references
to cases, rather than the actual case files. Removing a case from a
folder or deleting the folder has no effect on the case itself. A particular
case may be referenced from any number of folders.
When you add cases to a folder that is owned by another user, be aware
that the folder's owner may remove your cases if he or she wants to.
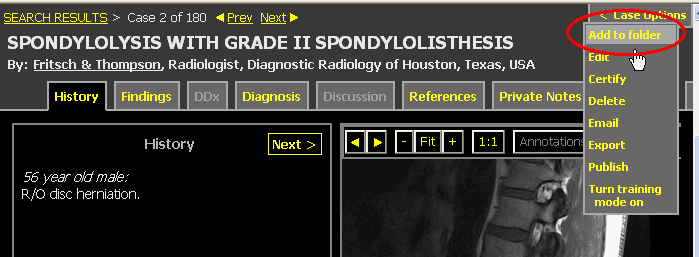
While browsing cases, if you visit a case that is of particular interest, you can add it to a folder with a single click. For previous interface see Classic Case Viewer.
- While viewing the case, choose "Add to Folder" from the Case Options drop down menu:

Hint: if the "Add to folder" link does not appear, you may not be logged in.
- From the Add Case to Folder page, select a destination
folder from the popup menu, or enter the name of a new folder to be
created:

The drop-down menu includes all folders which you are allowed to add cases to. The folders within your home folder are listed first, followed by all other folders that are writable by the public or by groups that you belong to. If a folder does not appear, it means you do not have write permissions to that folder.
If you decide to create a new folder instead of using an existing one, it will be located in your home directory. If you want the folder to be located elsewhere, you can move it. - Click the "Copy Selected Cases" button to submit the form.
You may add multiple cases at a time to a folder whenever you are viewing a list of cases, including:
- search results
- a list of cases by category (e.g. "Lung > Neoplasm")
- the contents of another folder
To add cases from the list:
- Click "Copy one or more cases to a folder" which appears
at the bottom of the list:

- Specify a destination (see Step 2 above in "Adding the
Case that you are Currently Viewing" for details about specifying
a destination):

- Click the checkbox to the left of each case that you want to copy:

Hint: to mark all the checkboxes at once, click the "Select all" checkbox at the bottom of the list.
- Press the "Copy Selected Cases" button. The cases will be copied to the destination folder.
Once the reference to a case is added to a folder the Additional Details section of the case view will provide links to all the folders the case is referenced in.
