The owner of a case can grant read or write priviledges to members of a group. If group members have read-only access, they can view but not edit the object. If group members have writeable access, they can edit the case or add contents to the folder.
To see which groups you belong to:
- Log in to your account, and click Options in the top navigation bar.
- Click the link under "Manage Groups".
- You will see a listing of the groups you belong to, followed by a table showing membership information about
groups you control.
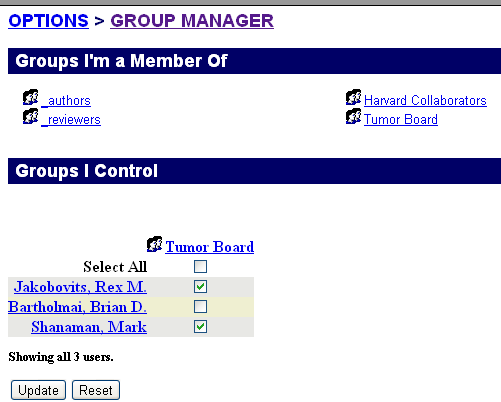
The columns of the table are the names of your controlled groups. The rows are the system users. Individual fields are checked if the user in that row is a member of the group for that column. Adding a check to a field indicates that you want the user added to that group, while clearing a check indicates that you want the user removed.
Note that administrative users automatically have access to all groups.
- When you are satisfied with the changes you want made, select Update. This will list the changes that are about to be applied, offering you the opportunity to confirm the changes by clicking Yes or cancelling the changes by clicking No.
- After confirmation, the system will provide you with a summary of changes made and a refreshed view of your groups.
- To view other details about a particular group, click
on the group name in the main group view. For example, here is the Tumor Board group:
The group view page provides information about the group, including:
- All cases readable or writable by members of the group
- A list of all group members, including links to their user information pages
- Information about the group's owner
- Additional controls for editing the group, if you are its owner
You can retrieve a list of cases that are readable or writable by
the group, as well as view information about each of the group members.
If you want to be added to a group that you are not a member of, send email to the group's owner or to your administrator.
Next: Creating a New Group