You can export cases as standalone HTML, which you can save to a disk for accessing when you are not connected to the intranet. For example, you can use this to save cases for presenting at a conference, or to study at home. You may only export cases which are writable by your account.
Exported cases will be packaged in a container called a Zip file , which enables you to download multiple files in a single operation. Windows XP has built-in software for handling zip files, while other operating systems require utility software to be installed. Prior to exporting cases, take a moment to determine whether or not your PC is equipped to handle Zip files: try opening a zip file by clicking on this link: test.zip . If your PC does not recognize the file type (e.g. if it asks you to indicate which application to use), then you should download and install Zip software such as http://www.winzip.com , or talk to your systems administrator.
You may export a case if you have write permissions on that case. To export a case:
-
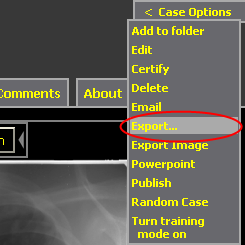
Visit the case you want to export, and choose
Export
from the Case Options drop down menu (for previous interface see
Classic Case Viewer
):
Note: if the Export link does not appear, you may not be logged in, or you may not have write privileges to the case.
-
From the export form, select HTML format, and press the Export Case
button:

-
It may take a minute or two for the exported case to be packaged
into a zip file for you to download:

-
Click the link labeled
"Download zip file of cases"
to download and launch the extraction software on your PC which is
associated with zip files. If you are prompted to open the file, click
"Open":

Use the zip handler software to extract the contents of the zip file. For example, if you are using WinZip, click the Extract button:

A dialog box will pop up, asking for a destination folder for the extracted files:

Specify a destination on your hard drive to contain the exported case files and images. For example, you can choose your Desktop.
Be sure that the radio button indicates that all files should be extracted. Click the Extract button. The cases will be extracted to a folder in the location you specified. The new folder will have a name that starts with "zipDir...".
You can save this folder to any portable media, such as floppy disk, CD-R, or USB drive.
-
To view the extracted case, open the folder whose name starts with
zipDir (you'll need to navigate to wherever you saved the folder,
such as your Desktop or a floppy disk). Within the folder, open the
HTML file named
index
:

This will launch internet explorer on the local HTML file, which is an index page with a link to the exported case:

Click on the case link to view your offline copy of the exported case:

The default view shows small images. You can view the images in their original size by clicking "as-submitted".
To export multiple cases at once, add them to a folder , and then export the contents of the folder:
-
Visit the folder you want to publish, and click on "Folder Options"
in the folder title bar:

-
From the Folder Options page, click on "Export Folder" which appears
under "Misc. Operations":

Note: if the Export Folder link does not appear, either you do not own the folder, or the folder contains no cases which are writable by your account.
- From the export form, select HTML format, and press the Export Cases button:
-
Click on the link to download the zip file and launch the zip extraction
software. This may take a long time if you are exporting a large number
of cases:
-
Extract the zip file to a directory and open the index page by following
instructions in
"Export a Single Case"
above, steps
#4 - #5. The index page will contain links to all the exported cases:


This will export all cases in the folder that are writable by your account. The process may take a long time if the folder contains many cases. Note: if the folder contains cases which are not writable by you, they will be skipped.