Before adding images to a case, you need to have those images saved as files on your hard drive and ready to upload. This may involve exporting images from your PACS, taking a screen capture, or emailing the images to yourself. Images can be in any common format, such as JPEG, GIF, PNG, PSD, TIFF, Bitmap, or DICOM. Please see Preparing Images for more information.
To add images to a case:
-
Access the
Add Images
form as follows:
To add images to a case you just created , click "Add Images to this Case" which appears near the bottom of the screen after you submit the new case form:

To add images to a case you created earlier , navigate to the case, click "Edit" in the case title bar to launch the Case Editor, then click "add images" which appears to the right of the case title:
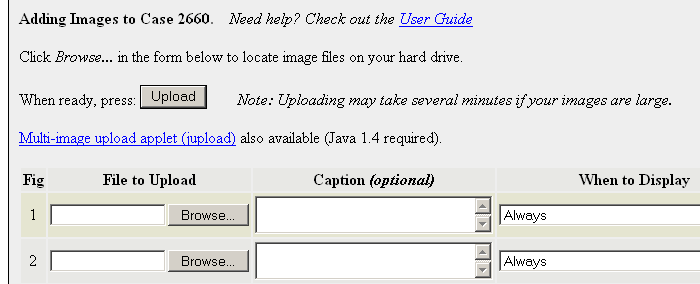
This will take you to the Add Images form, which allows you to add up to ten images to a case (you can add more at any time):

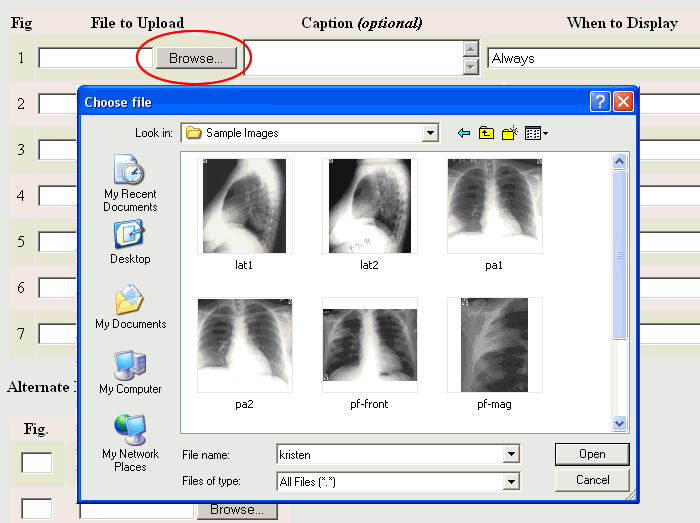
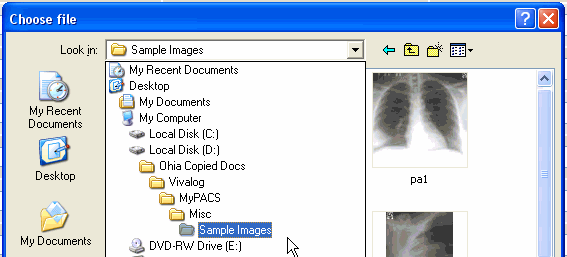
- To specify the location of an image to upload, click the first Browse... button under the Source column, which will launch a Choose file popup:
-
You may optionally enter a
caption
for the image.
The caption may simply identify the image parameters (e.g. "Axial
Pre-Contrast T1"), or you it can include a paragraph describing the
findings in the image. The caption will not appear when the user is
viewing the case as an unknown during
Training
Mode
, so it is safe to include findings in the caption. You do
not need to enter a figure number, as those will be automatically
generated.

-
If you want to control
when the image is displayed
(the default is
Always),
specify the criteria using the drop-down
menu under
"When to Display":
The choices are:
- Always: the image will appear regardless of what stage of training mode the user is in. This is the most common setting.
- Always except during "View as Unknown": the image will be omitted during the first stage of training mode. This is useful for images that explicitly reveal findings, such as close-ups or images marked with graphical annotations (e.g. arrows pointing out findings).
- Only during "View as Unknown": the image will only appear during the first stage of training mode. If you have two copies of an image (one that is marked up with graphical annotations), you can use this setting to have annotations effectively turn on or off as the user switches between stages of training mode. Upload the two images in adjacent positions, then set the annotated image to display "Always except during View as Unknown" and the non-annotated image to display "Only during View as Unknown".
- Only during "Reveal Findings & Captions": the image only appears during the 2nd stage of training mode.
- Only during "Reveal Full Case": the image only appears during the final stage of training mode.
-
Repeat steps 2-4 for each image that you want to upload, then press
"UPLOAD". Only click UPLOAD once. It may take several minutes
for the images to upload, depending on the size of the images and
the speed of your network connection. The resulting case is then displayed:
The images are converted into JPEGs and resized for optimal web viewing. You can always retrieve the originally uploaded images by clicking on the "original format" link.


Next: Editing a Case